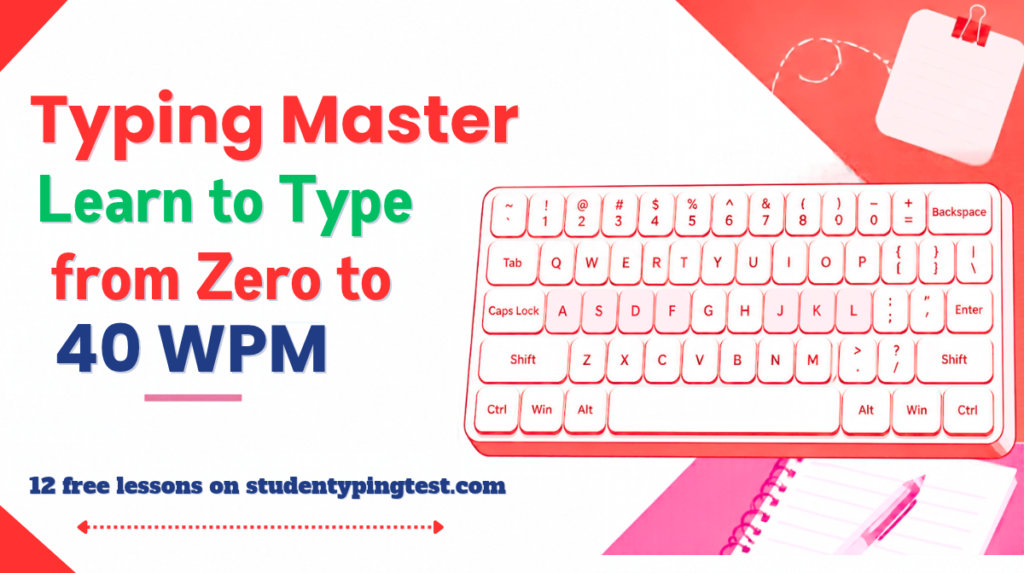
Most Students type with two or three fingers and look at the keyboard all the time. It works but it is slow. In this Tips you will learn a better way called touch typing. You will see where each finger goes which lessons to do first and a simple plan to reach about 40 words per minute (WPM). Everything here is free and you can practice right on this website. You do not need to install any software.
The guide is written in simple English so students parents and teachers can all follow it.
What is touch typing?
Touch typing means typing without looking at the keys. Each finger has its own small group of keys. After some practice your fingers remember where the keys are just like you remember where the buttons on your phone are. Your eyes stay on the screen so you can read what you write and catch mistakes quickly.
Typing with two fingers while looking down is often called hunt and peck. Many people can reach 20 to 25 WPM this way. It is hard to go much faster because you have to find every key with your eyes first. With touch typing 40 WPM is a realistic goal for most students who practice a little each day.
Why should a student learn to type properly?
- Homework and projects. Writing on a computer is much faster when you do not search for letters.
- Online exams and tests. Many school tests and job tests are taken on a computer and some of them have a typing speed requirement.
- Less tiredness. When you type with all your fingers no single finger does all the work.
- Better focus. You think about your ideas not about where the letter P is.
- A useful skill for jobs. Office work data entry writing and many other jobs use a keyboard every day.
What does WPM mean?
WPM means words per minute. It tells you how fast you type. On this website every group of 5 characters counts as one word. Letters spaces and punctuation marks all count. If you type 200 correct characters in one minute your speed is 40 WPM.
Accuracy is just as important as speed. Accuracy is the percentage of keys you typed correctly. If you type very fast but make many mistakes you have to fix them and that takes more time. So in the beginning aim for accuracy first. A good target is 95% or higher. Speed will come by itself.
Before you start: sit the right way
Your body position matters. Here are simple rules you can follow today:
- Sit up straight with your back against the chair.
- Keep both feet flat on the floor.
- Bend your elbows at about 90 degrees.
- Keep your wrists relaxed. Do not press them hard on the desk.
- Place the screen about an arm’s length away with the top of the screen near eye level.
- Take a short break every 20 to 30 minutes. Stretch your hands and look at something far away.
If your hands or wrists hurt stop and rest. Pain is not a normal part of practice. If it continues please speak to a doctor.
The home row: where your fingers live
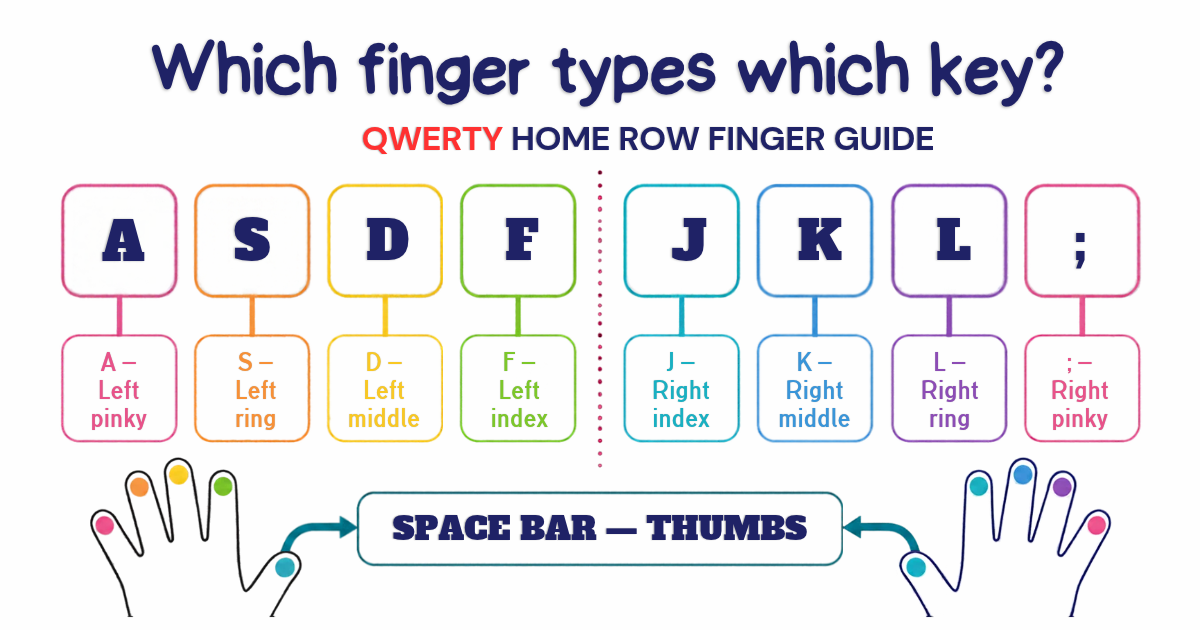
The home row is the middle row of letter keys. Your fingers rest here and they return here after they reach for another key.
- Left hand: A (little finger) S (ring finger) D (middle finger) F (index finger)
- Right hand: J (index finger) K (middle finger) L (ring finger) ; (little finger)
- Both thumbs: rest on the Space bar
Look at the keys F and J on your keyboard. They have a small bump. The bumps help your index fingers find the home position without looking down.
The 12 Typing Master lessons
The Typing Master course on this website has 12 lessons. You learn a few new keys in each lesson and every lesson has short parts: a simple explanation a key drill a word drill and a paragraph drill. The next part opens when you pass the one before it.
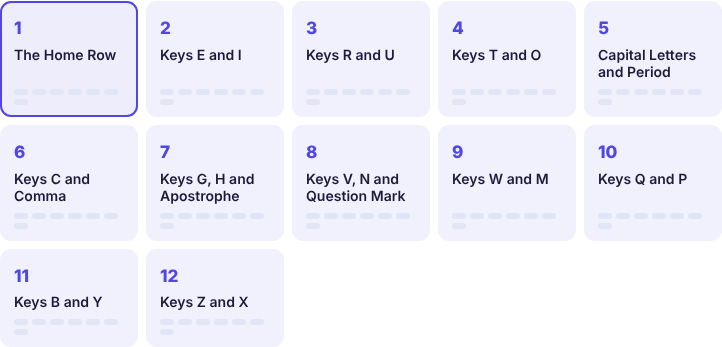
Here is what you learn in each lesson:
- The Home Row: A S D F J K L ; and the correct hand position.
- Keys E and I: your first keys from the top row.
- Keys R and U: more top row keys with your index fingers.
- Keys T and O: longer words begin to appear.
- Capital letters and the period: how to use the Shift key and finish a sentence.
- Keys C and the comma: bottom row keys and your first punctuation.
- Keys G H and the apostrophe: the middle keys that the index fingers reach sideways.
- Keys V N and the question mark: you can now ask questions in your typing.
- Keys W and M: two more letters with your ring finger and index finger.
- Keys Q and P: the far corners typed with the little fingers.
- Keys B and Y: two keys that are easy to type with the wrong finger so go slowly.
- Keys Z and X: the last letters. After this you know the whole alphabet.
How a lesson works
When you open a lesson you first see a short explanation and a keyboard on the screen. The keyboard uses colors so every finger has its own color. The next key you need is highlighted and the website also shows which finger to use. There is also a picture of two hands that lights up the correct finger.
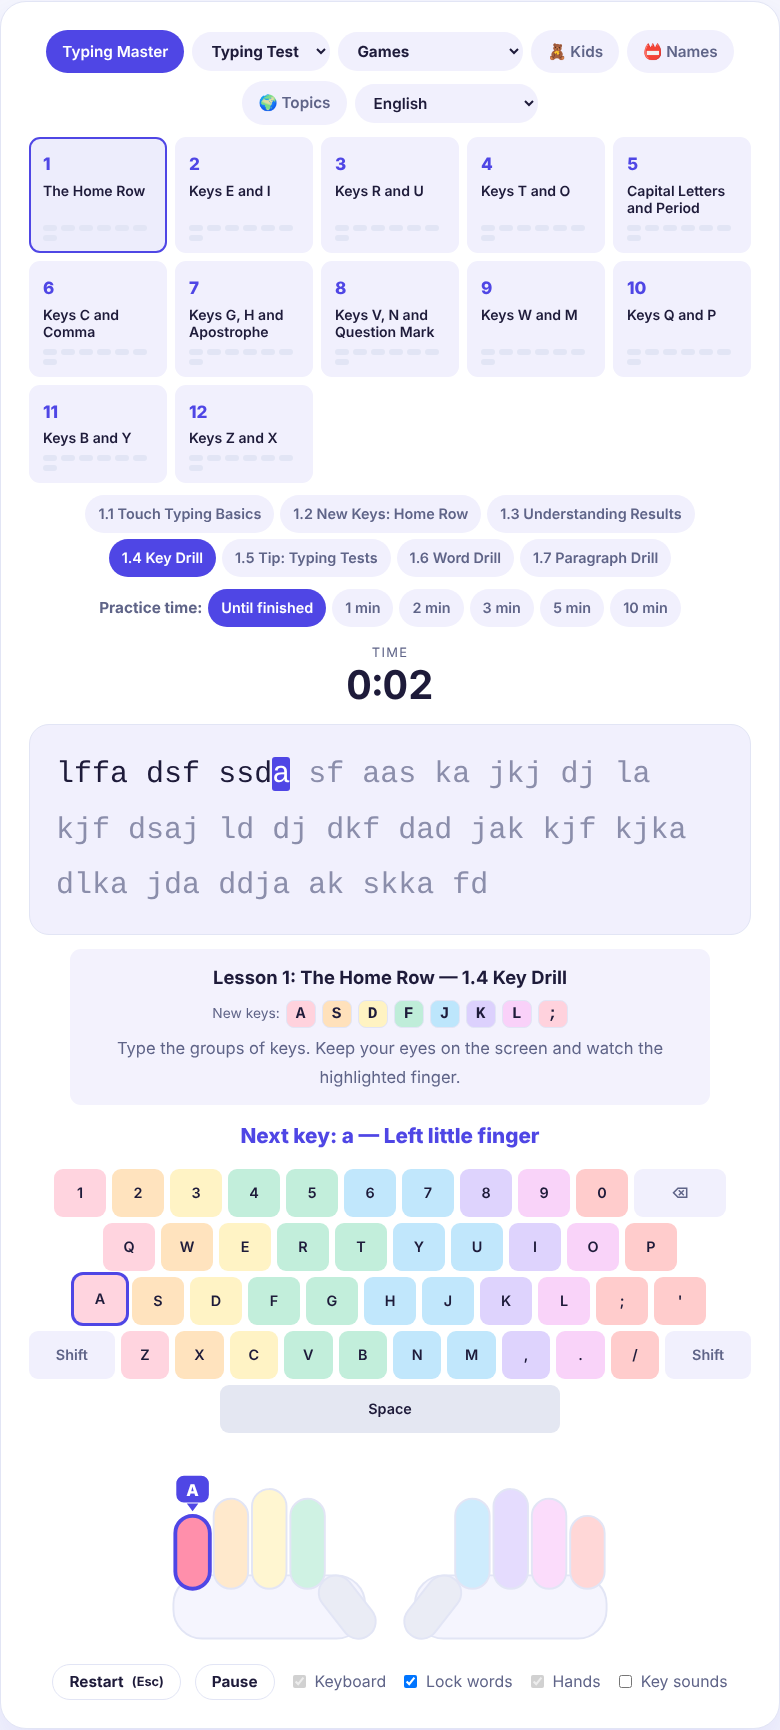
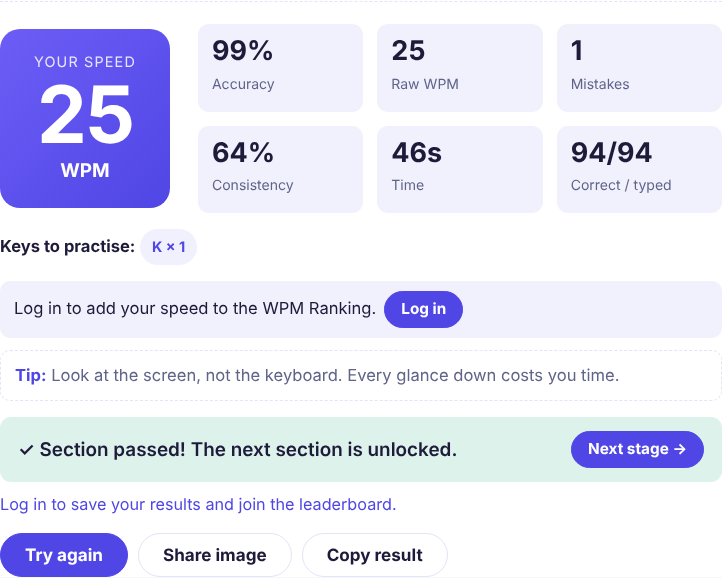
At the end of each part you see your result: your speed in WPM your accuracy how many mistakes you made and which keys gave you trouble. If your accuracy is high enough the next part opens.
You can also choose how long to practice: until the text is finished or 1, 2, 3, 5 or 10 minutes. Beginners can start with until finished and use the timed choices when they feel ready.
A simple 4 week plan
You do not need to practice for hours. Short regular practice is better than one long session. Here is a plan that needs about 20 minutes a day. These are typical numbers. Everyone learns at a different speed so do not worry if you are a little faster or slower.
Week 1: Lessons 1 and 2
Learn the home row and the keys E and I. Do not try to be fast. Look at the screen not at your hands. If you make a mistake just keep going. Your goal this week is correct finger position. Many beginners are around 10 to 15 WPM at this stage and that is normal.
Week 2: Lessons 3 to 6
You learn R, U, T, O, capital letters the period C and the comma. You can now write real words and short sentences. Repeat any section where your accuracy is below 95%. Take the 60 second typing test at the end of the week to see your starting speed.
Week 3: Lessons 7 to 10
Now you learn G, H, V, N, W, M, Q, P and the apostrophe and question mark. These keys are harder to reach so you may feel slower. This is a normal part of learning. Keep practising and your fingers will remember.
Week 4: Lessons 11 and 12 then review
Finish with B, Y, Z and X. After that go back to the lessons where you were weakest. Practice the word drills and the paragraph drills again and try the timed choices. Many students reach somewhere between 25 and 40 WPM after a month of daily practice but your own result may be different and that is fine.
Common mistakes and how to fix them
- Looking at the keyboard. This is the biggest habit to break. Cover your hands with a thin cloth or just look at the screen. The coloured keyboard on this website is there to help you at the start. You can switch it off when you feel ready.
- Typing too fast too early. Speed without accuracy gives you bad habits. Slow down until your mistakes are very few.
- Using the wrong finger. It feels quicker at first but it stops you from improving. Follow the finger colors.
- Not returning to the home row. After each key let your finger go back to its home position.
- Practicing only when you feel like it. A little every day works better than a long session once a week.
- Hitting Backspace after every mistake. In the lessons keep going and watch which keys give you trouble. The result screen shows them to you.
How to check your progress
Do not take a typing test after every lesson. Check yourself once a week at the same time of day with the same kind of test. This shows you your real progress. You can use the free typing test on this website. It has 15, 30, 60 and 120 second choices and also tests with a number of words.
If you log in your results are saved and you can see your progress chart. You can also add your speed to the WPM Ranking after you pass a lesson. Logging in is optional. You can use the tests and lessons without an account.
What if my speed is below 30 WPM?
That is a good place to start. If your speed is below 30 WPM the best thing you can do is follow the Typing Master lessons from the beginning because they build the habit of using all your fingers. Free online lessons on this website are enough. You do not need any offline typing software.
Other ways to practice
- Typing games: falling words and other games make practice more fun and you still train your fingers.
- Kids typing: big letters and short words for younger children.
- Typing tips: short practical advice to improve your speed and accuracy.
- Typing your own name and favourite words. This helps you practice words that you use every day.
Tips for parents and teachers
Children can start touch typing when their hands are big enough to reach the keys comfortably often around age 7 or 8. Keep the sessions short around 10 to 15 minutes and praise accuracy not only speed. In a classroom a short typing practice at the start of a computer lesson about 10 minutes is more useful than one long lesson each month. Let every student work at their own pace and finish the lessons in order.
Frequently asked questions
How long does it take to learn touch typing?
Most beginners learn all the keys in about 2 to 4 weeks if they practice 15 to 30 minutes a day. Getting faster takes longer. Reaching 40 WPM can take one to three months depending on how often you practice.
Is 40 WPM a good speed?
Yes. It is a little above the average for many adults and it is enough for most school and office work. Many students later aim for 50 or 60 WPM.
Do I need a special keyboard?
No. Any normal keyboard works. A keyboard with the F and J bumps helps and most keyboards have them.
Can I learn on a phone or tablet?
You can do the tests there but touch typing is meant for a physical keyboard. For the lessons use a computer or a tablet with a real keyboard.
What should I do if I keep making mistakes on one key?
Look at the Keys to practice part of your result. Go back to the lesson that teaches that key and repeat the key drill slowly.
Do I have to pay or create an account?
No. The lessons tests and games are free. An account is only needed to save your results across devices join the WPM Ranking or share your result.
Final words
Typing well is a skill and like any skill it grows with practice. Sit properly put your fingers on the home row go slowly and keep your eyes on the screen. Do a little every day and move through the 12 lessons in order. You may be surprised how much better you type after one month.
Start Lesson 1 of Typing Master now and see where you are after your first week.
Note: the speeds in this guide are typical examples. Real progress depends on age practice time and the keyboard you use.
